


There are countless benefits to building sites on top of WordPress, but when creating a site for a client not savvy in HTML and CSS, there are definitely some challenges. One of the main limitations is the single defined area for editing content.
While you could always use the “text” tab to write HTML directly into the editor, it kind of defeated the point of using WordPress in the first place. As tempting as it was to write in a snippet of code to wrap some content in a neat little package, you would be asking for trouble by doing so. When your client updated the content and proceeded to leave you a panicked email about a broken page, that bit of HTML would haunt you.
Along Comes the Shortcode, HTML in Disguise
For me, using Shortcodes seemed like the answer to my problems. Here was a way for me, the developer, to neatly wrap some content in a div which could then be styled and positioned the way I wanted it, and all within the wysiwyg editor. All you had to do was add some code to functions.php , where the client could not reach it, and wrap your text in a defined code word surrounded by brackets. I thought, “how hard could this be.” Again, another panicked email (cue the AOL dial up noise.) “My site is broken! Please help!!!” As it turned out, using Shortcodes to wrap content was just as painful for clients as writing HTML in the “text” tab. Plus, they could be a little finicky to work with. They tended to create unwanted paragraph tags which could sometimes became a layout nightmare. Also, if you wanted to move that content into a different part of the page, you had to use jQuery to manipulate the DOM and place the content where you wanted it to be in the first place. Don’t get me wrong, Shortcodes have their utility, but they can create a lot of headaches for you and your client.
Welcome Advanced Custom Fields
Along came the answer, like a gift from the heavens. Advanced Custom Fields changed my life as a web developer forever. For me, this was and still is the single most important plugin ever developed for WordPress. Created by Elliot Condon, this plugin has given limitless potential for creating custom fields for your clients to fill in without being afraid of breaking their pages. You can capture the data from those fields and output it anywhere on the page with a few snippets of PHP in your template files. You are no longer limited to just the area that gets outputted in the WordPress loop.
A Quick Look at Creating fields
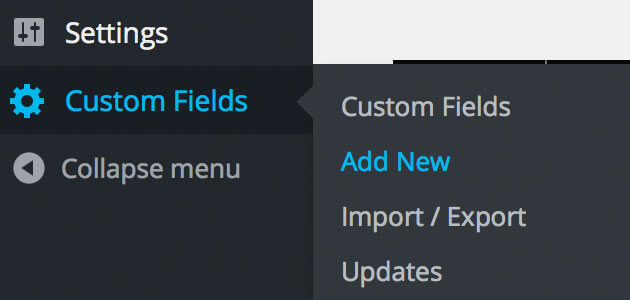 Once you’ve installed the plugin, creating fields is a snap. You’ll find the Custom Fields options towards the bottom of the WordPress Dashboard.
From there, you can create a group of custom fields and define where you want those fields to show up.
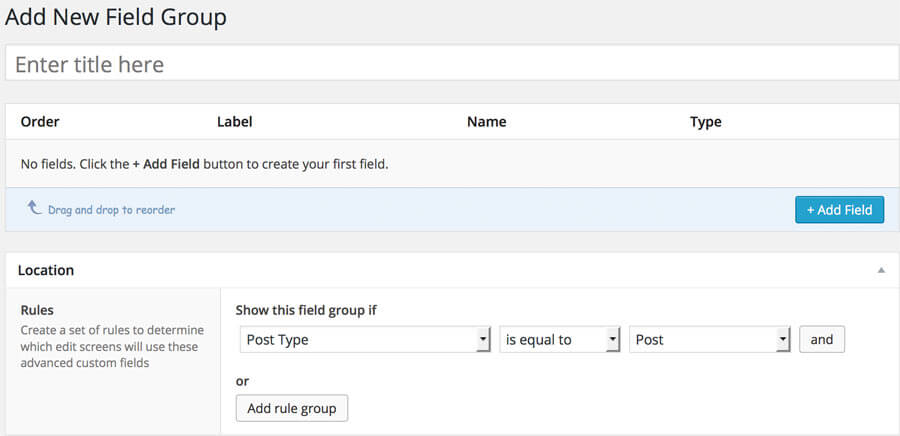 ACF offers a lot of options for this. You can choose to only show those fields for a specific page, a post, a page template and on and on. Once you’ve defined where you want those fields to exist, you start adding fields. For this demonstration, I’ll just be adding a basic text field.
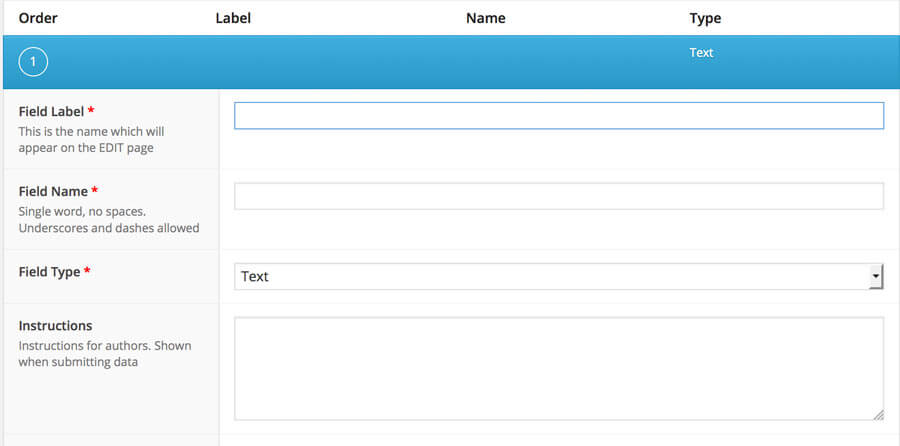
Give your field a label. You want to keep it short but descriptive. It should be obvious to the client what the field is for. Also try to stick to a naming convention. This will come in handy when you write the code to your template. The slug will automatically get generated for you in the field name. This is what you’ll need for your code in your template file. Next, you just select the type of field you want to add. For adding a simple text field, you could stop there and not fill out any more of the many options. Play around with those for more optimization. Don’t forget to publish your new field group.
Filling Out Your New Field
Back at the page(s) that you defined when creating the field group, your new custom text field will appear. Write some text in the field and then publish/update your page. For now, that text will not show up on your page. Why? You haven’t updated the template yet.
Final Step – Write Your PHP into the template file
In your template file, add:
<?php the_field('slug'); ?>
//slug is equal to the slug for that particular field
Wrap that snippet of code around any HTML you want. You can wrap it in a div and give it a class name.
<div class="myDiv"><?php the_field('slug'); ?></div>You can use this to add a class name:
<div class="<?php the_field('slug'); ?>"></div>If you want it to render as plain old text, make sure to wrap it in a paragraph tag. When you push your file, and check the page, the text you entered into your custom field will now display wherever and however you styled it.
As you can see, ACF is a very powerful tool. It makes things easier for you as a developer and more importantly, for the client. Let’s not forget, we are in a service based industry. If the client finds it easy to update the site, they will be more inclined to refer you to others.
What I have demonstrated is just the tip of the iceberg when it comes to ACF. The basic version is free and has a lot of useful features. I wholeheartedly endorse the pro version which offers more features like repeater fields. If you are a developer, you will more than make up for the cost with time saved by using this tool.
No comments yet. You should be kind and add one!